
A table of contents.
1. Why do we need to set up DHCP?
2. How to set up DHCP for your server.
3. How to test DHCP setup works properly.
4. Conclusion.
Why do we need to set up DHCP?
If you haven’t set up DHCP on the router your clients will not be able to access your server because they will not know which IP address they should access. In that case, you might need to set up DHPC to a “static” IP address.
Take into account that the definition of a “static” IP address is not static IP address despite your setting up DHCP. That means when your router restarts the IP address will be replaced with a new IP address. If you want to get a consistent static IP address you have to ask your carrier provider.
When you set up all the configuration setup you must know the IP address to access the router admin webpage. It depends on which carrier you subscribed therefore you might need to search for that. In my case, I subscribed toVodafone which is a carrier company in Europe and the IP address is 192.168.0.1.
Once you’ve typed the IP address on the browser you will see the router admin webpage(Figure 1).

The appearance of the admin page might be different based on your carrier provider as well as the terminologies on the website might be different.
How to set up DHCP for your server.
There are three steps to set up DHCP and I will test if it works using ssh later on.
- To activate DHCP
- To assign a local static IP address to a specific device (in this case your server computer)
- To set port forwarding.
To activate DHCP
First of all, find where DHCP configuration on the router admin page and activate it(Figure 2–1).

To assign a local static IP address to a specific device (in this case your server computer)
Once your DHCP server is on now it’s time to connect a specific local static IP address to a specific device. Before we assign a specific local static IP address we need to know the MAC address of your server.
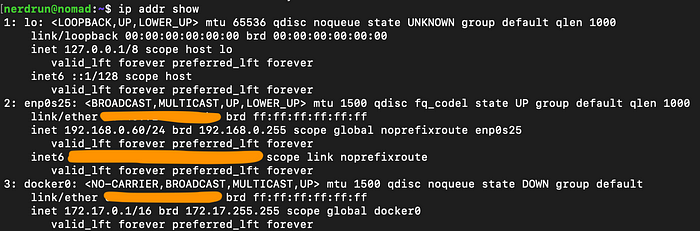
If you are using ubuntu OS for your server let’s type this command $ ip addr show in the terminal. You will see your MAC address next to link/ether (Figure 2–2).
Now let’s go back to the router admin page to set up the local static IP address for your server.
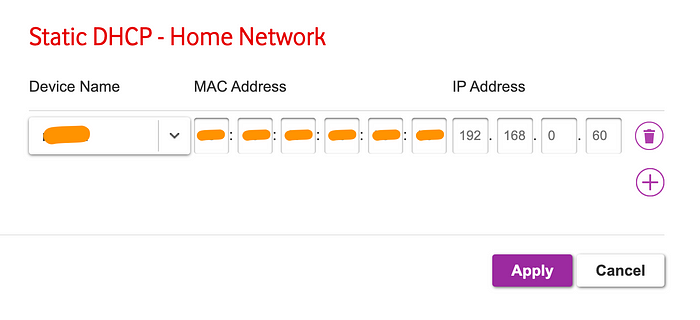
You might find the menu Static DHCP — Home Network (this name might be different based on carriers). And click + button to insert a new item. Fill out the MAC address of your server and any IP address that you might want to connect the IP to your server.
Normally, the local IP address range would be
Class A:10.0.0.0to10.255.255.25Class B:172.16.0.0to172.31.255.25Class C:192.168.0.0to192.168.255.255(probably excepted192.168.0.1for the router admin page)
In my case, I’ve set up 192.168.0.60 for my server(Figure 2–3).
To set port forwarding.
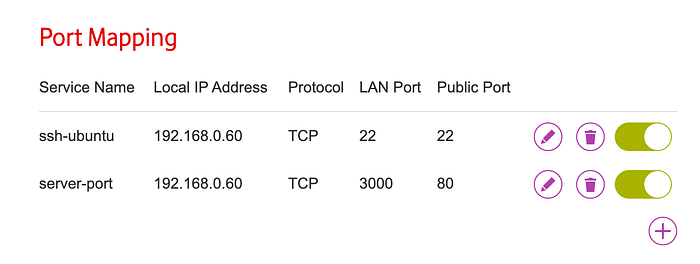
Lastly, you have to assign ports to your local IP so that the router will notice which port a request inbounds with.
Once you go to the port mapping menu click + button to add a new item and fill out a service name, a local IP address, a protocol, a LAN port, and a public port(Figure 2–4).
- A service name is for identifying which service it is which means you can name it whatever you want.
- A local IP address is what you’ve just assigned to your server as a local static IPaddress above.
- A protocol literally is for one of the protocols. Mostly you will fill out
TCP. - A LAN and public ports are internal and external ports. For E.g. a request with 22 port will be forwarded to your server by the external port and then it will forward to the LAN port in your server.
How to test DHCP setup works properly.
All right, all the setups are done. But how do we test if it works? If you prefer to test it running your backend server in your server you can go for it. But in this article, I will try it with an ssh connection.
The system environment that I’m testing is Ubuntu 22.04.
How to set up ssh
- Open the terminal and install open-ssh.
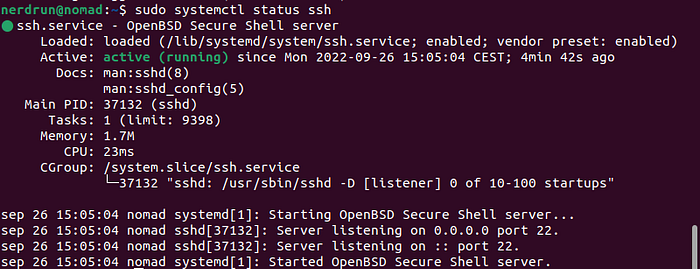
- Check if ssh is on the service(Figure 3–1).
- Allow ssh TCP rules on ufw and restart open-ssh(Figure 3–2, 3–3).
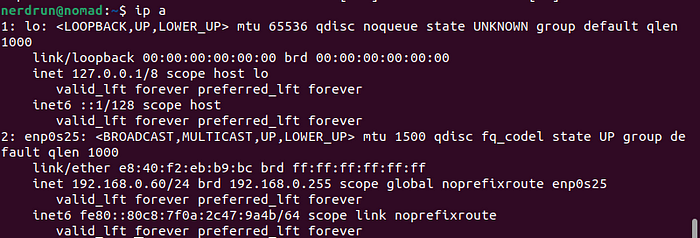
- Check your server IP address(Figure 3–4).
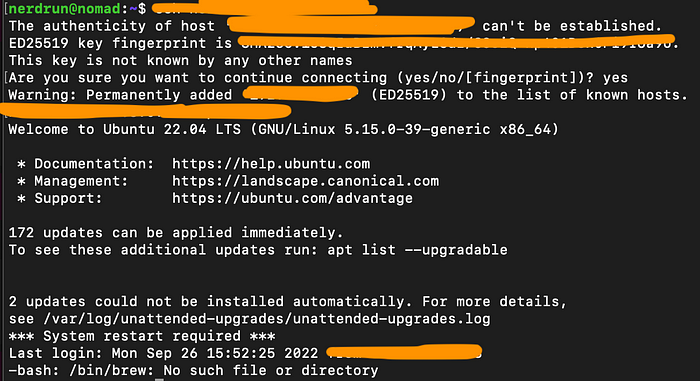
- Access your server via ssh command in another computer(Figure 3–5)
// 1. Open the terminal and install open-ssh.
$ sudo apt-get update
$ sudo apt install openssh-server -y/// 2. Check if ssh is on the service(Figure 3–1).
$ sudo systemctl status ssh/// 3. Allow ssh TCP rules on ufw and restart open-ssh(Figure 3–2, 3–3).
$ sudo ufw allow ssh
$ sudo ufw enable && sudo ufw reload/// 4. Check your server IP address(Figure 3–4).
$ ip a/// 5. Access your server via ssh command in another computer(Figure 3–5).
$ ssh [hostname]@[ip-address]


If you are using the same wifi you can access your server with the local ip address like
192.168.0.60of my local IP. However, if you want to test it properly as an external user you might need to use VPN. I will not mention any of the VPN software here.
Conclusion
You’ve learned what DHCP is and for. Moreover, you can distinguish between local and public IP addresses. Now you can make your server which can be accessed from out of the world.
Perhaps you might have a question while setup, please don’t hesitate to put comments.
